
INTRODUCTION
Hello everyone, my name is Inti Manassero, and I’m from Argentina. I'm a 3D artist currently looking for a job. In 2020, during the lockdown, I started studying Blender as a self-taught artist. Since then, I couldn’t stop learning every day. Now, I also know a few more software programs for my creative process, but let's not rush.
INSPIRATION
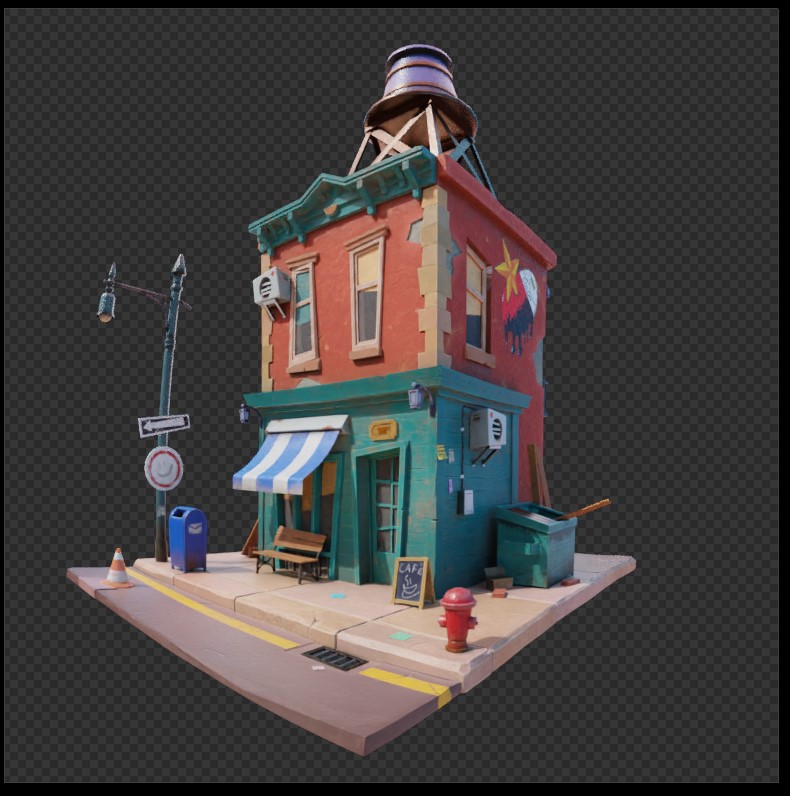
I always use concepts for the artworks I create. This time, I wanted to work on an environmental artwork to showcase my modeling skills in my portfolio. As a 3D generalist, having such pieces is essential for me.
I found a stunning stylized environment on Pinterest that immediately caught my attention. It's by Igor Rozovny, an amazing artist. You can check out his work on his ArtStation.
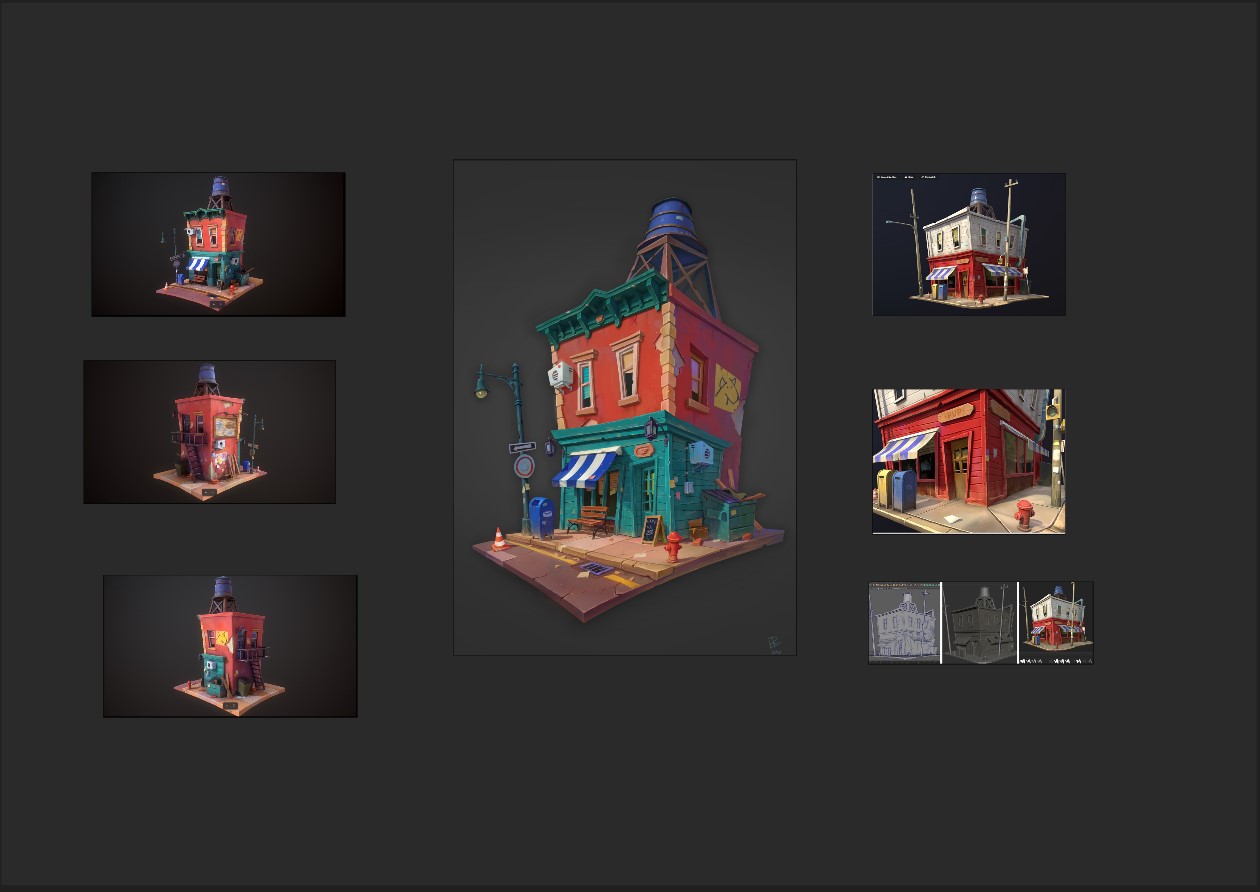
Once I had the concept art, I began compiling references from various artworks that matched the style I wanted to achieve. For this, I mainly used the 3D artwork already created by Dzmitry Doryn from Sketchfab, and other screenshots I had collected.
SOFTWARE INFORMATION
Software Used:
- Blender
- ZBrush
- Retopoflow (Blender addon)
- Marmoset
- Substance Painter
- RizomUV
MODELLING
For most of the artworks I create, I start with a block-out in Blender. This particular piece was primarily made using Blender, with a little help from ZBrush to add some detail to the wood. Perhaps I could have achieved a similar look by just creating textures in Substance Painter, but it's essential to leave room for experimentation and learn from any 'mistakes' made along the way. Taking note of these experiences helps me make better decisions in the future.


I started with a simple "cube" to create the main shape of the building. Initially, I wasn't concerned about achieving the cartoon look. Instead, I aimed to achieve that look using modifiers because I knew the shape would require several iterations. I didn't want to create a new object every time I didn't like the shape. I tried the simple deform modifier, but this method didn't work as the assets deformed differently. I needed something that could deform all the assets at once.


Now you can see the difference between the building with and without the modifiers affecting the basic shapes. And with that, the simpler shapes looked more alive.
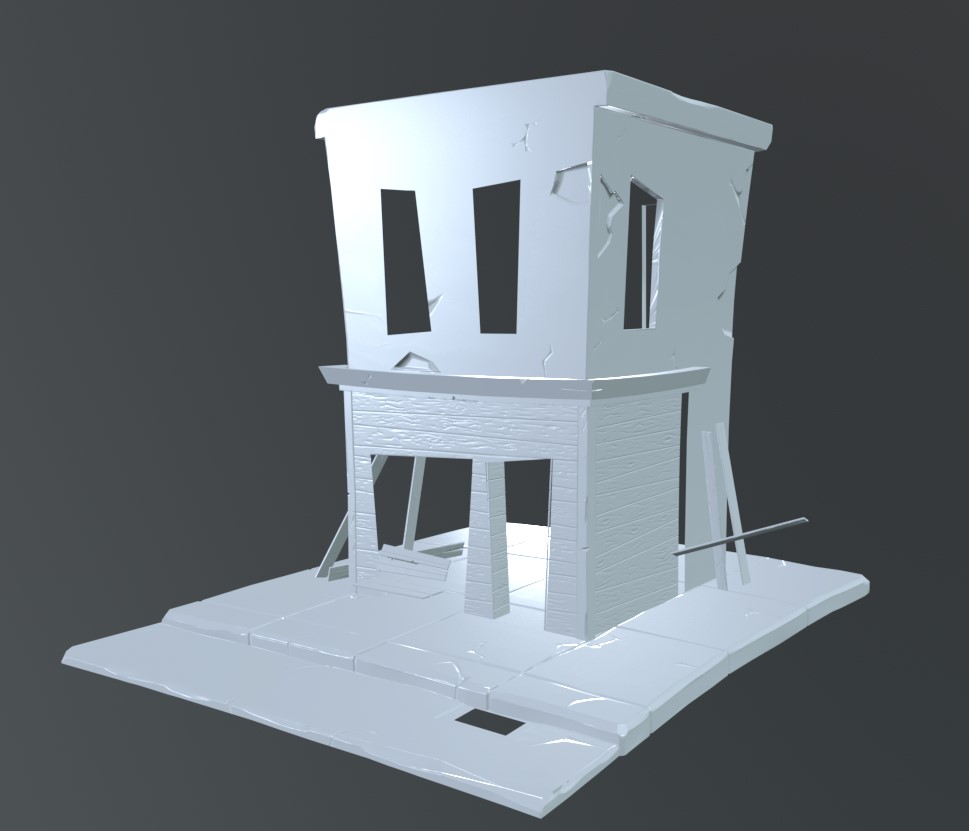
Once I was happy with the shape of the building, I started modeling all the other props. Now, it's time to add detail by sculpting in ZBrush.


SCULPTING
As I said before, maybe this step could have been done in the texturing stage, but I wanted to practice my skills in ZBrush too, so I chose to use the software anyway.


RETOPOLOGY
Well, now I had the modeling and sculpting complete, but I wanted a game-ready asset. Therefore, I needed to do a retopology and UVs. For the retopo, I used RetopoFlow in Blender.
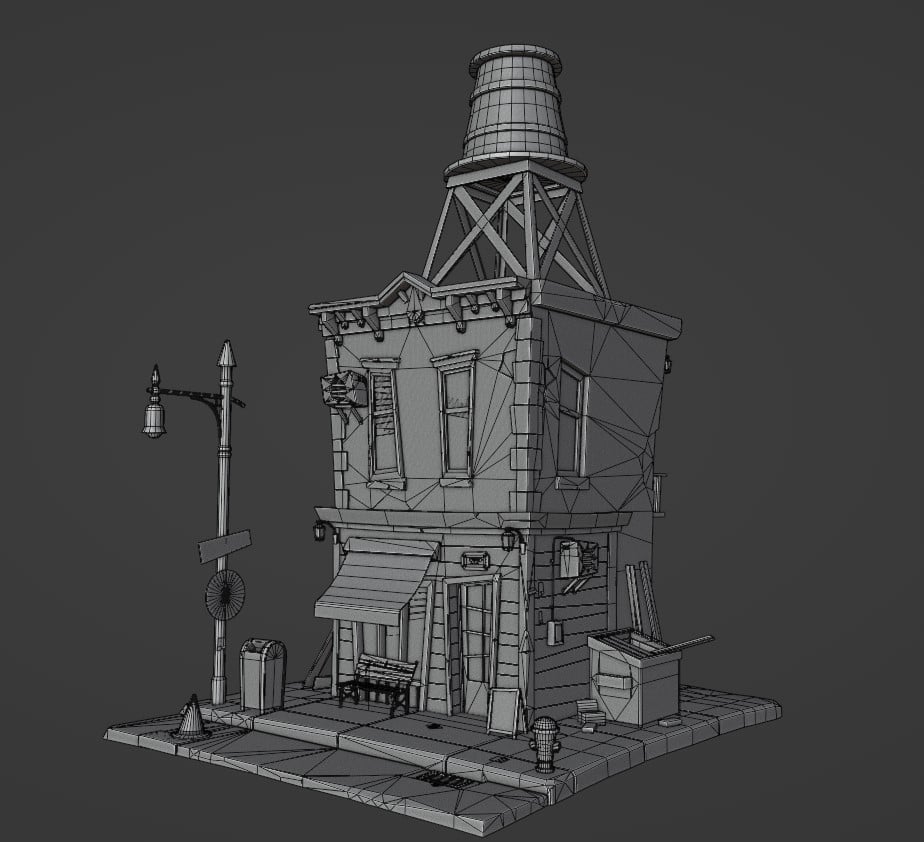
UV
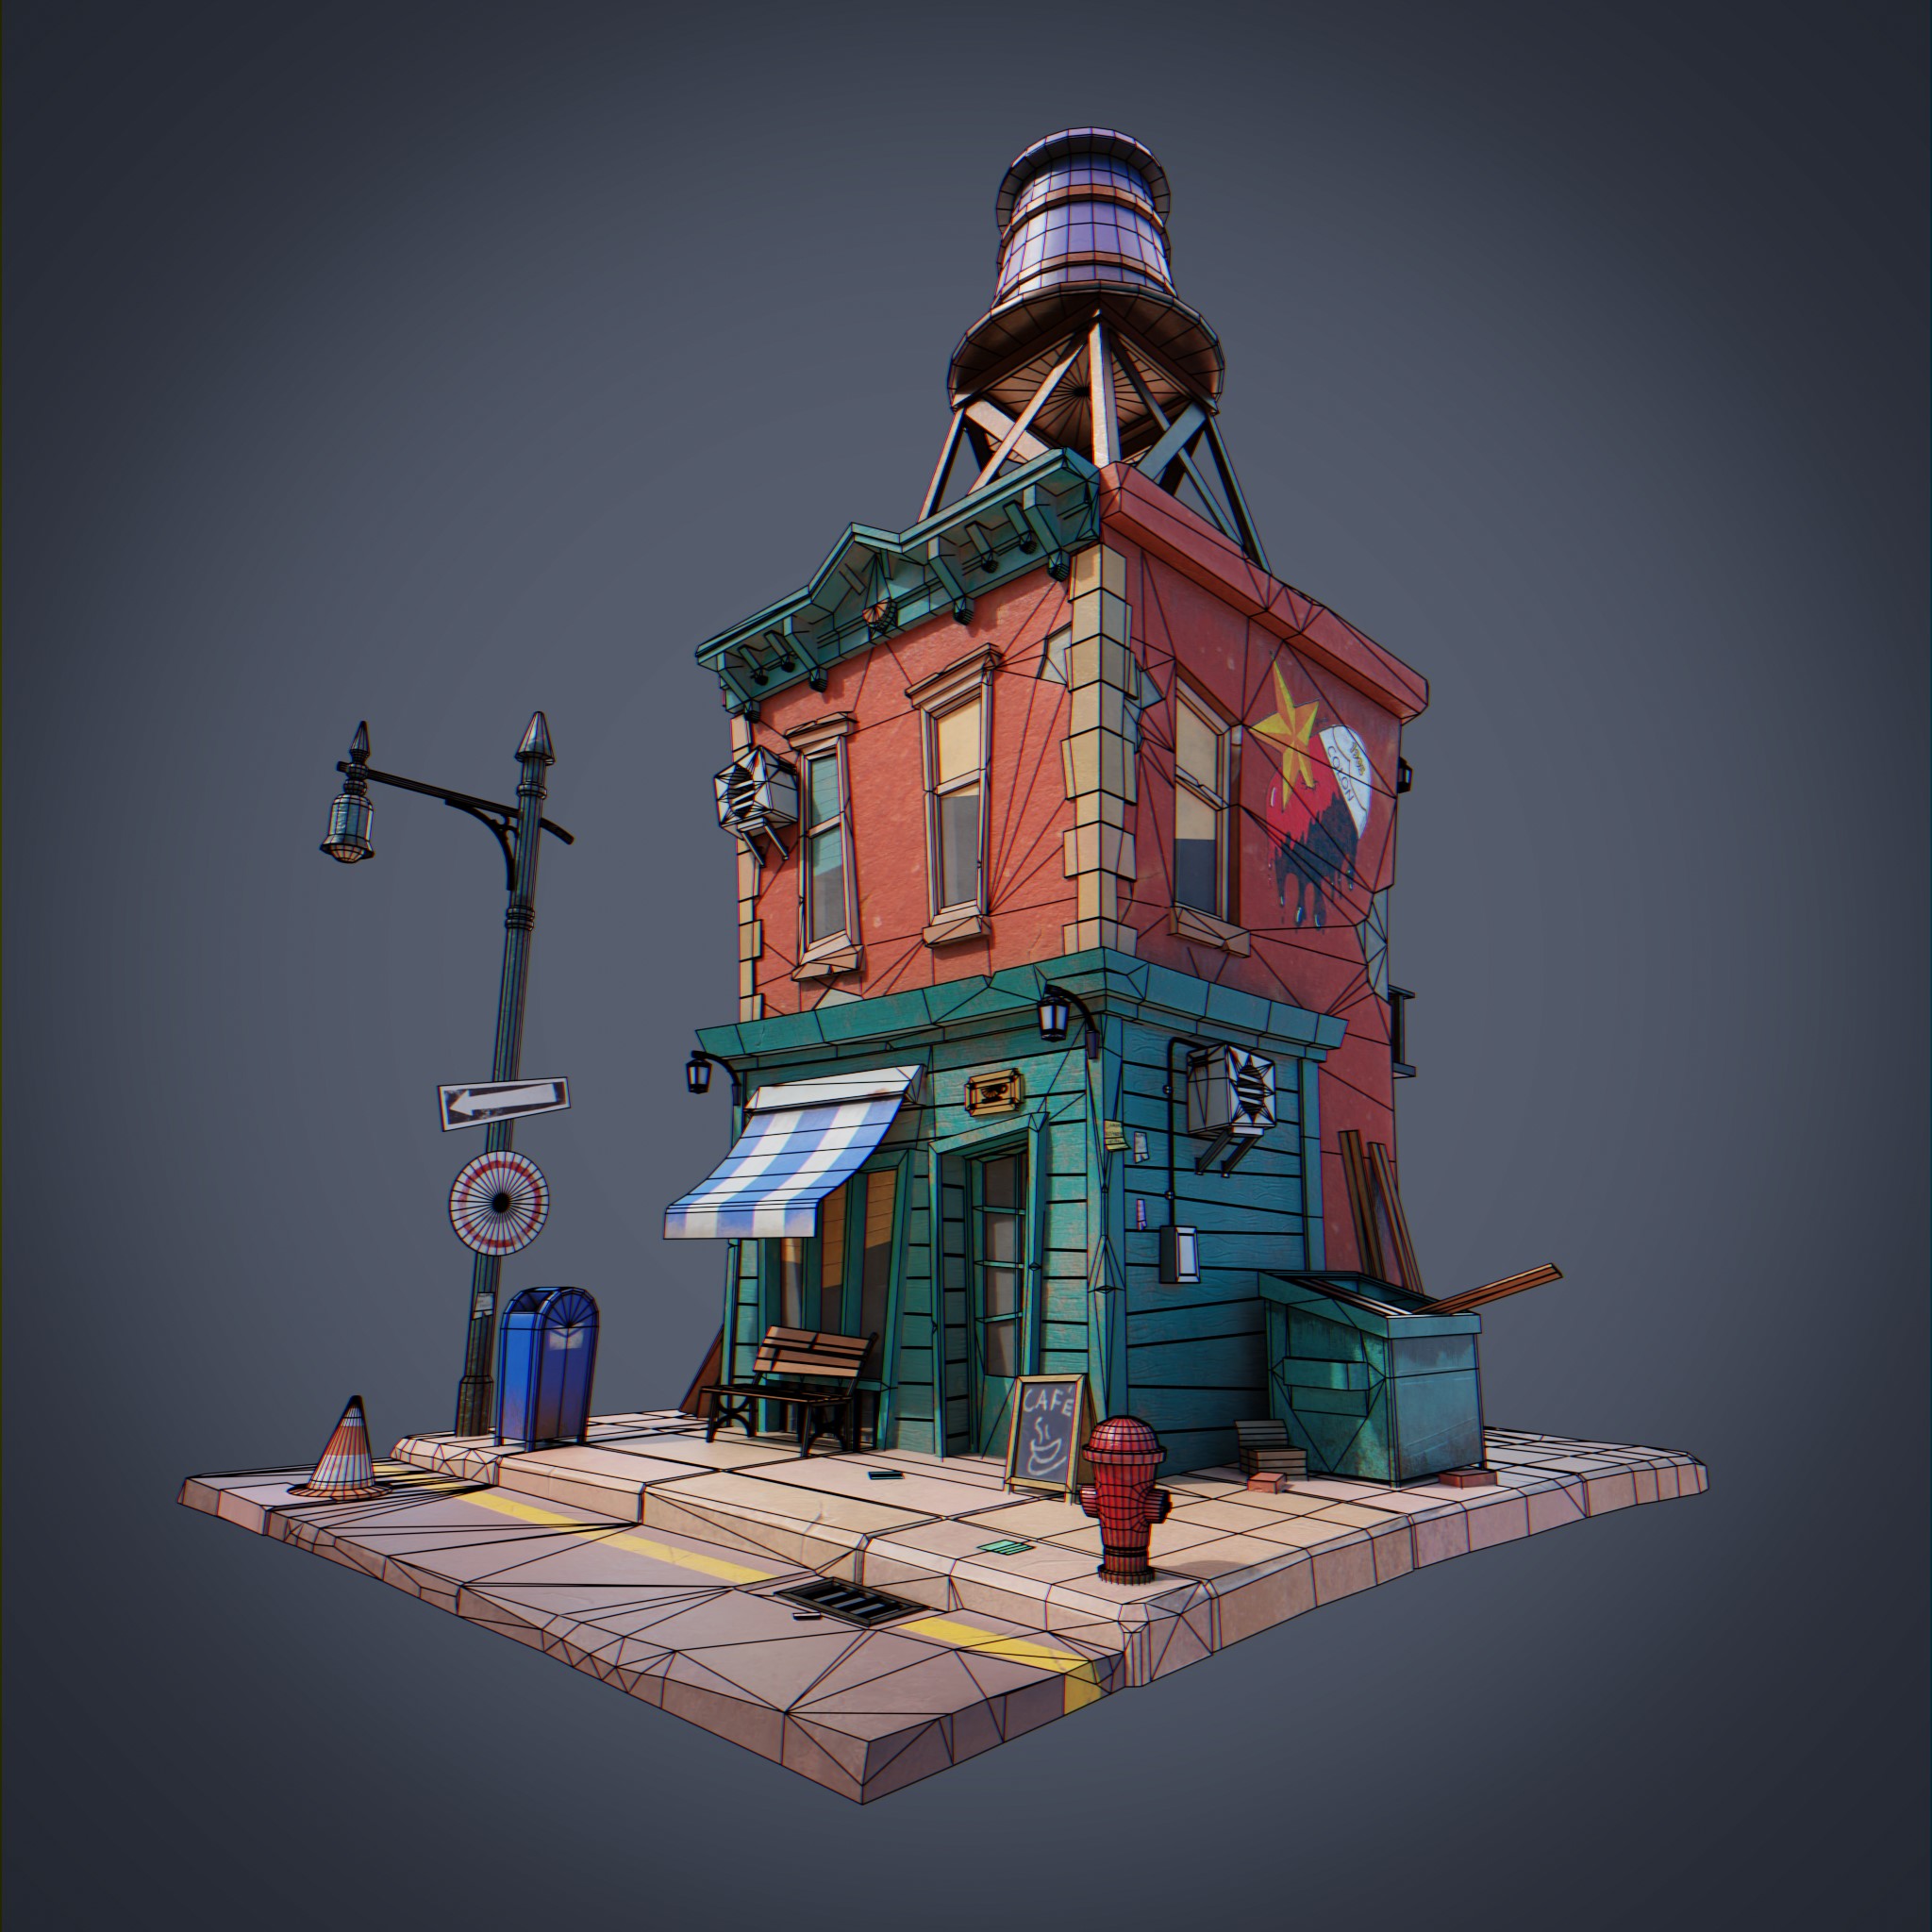
The final asset has a tris count of 20.3k. Once the retopo is finished, we need to proceed with performing UVs.
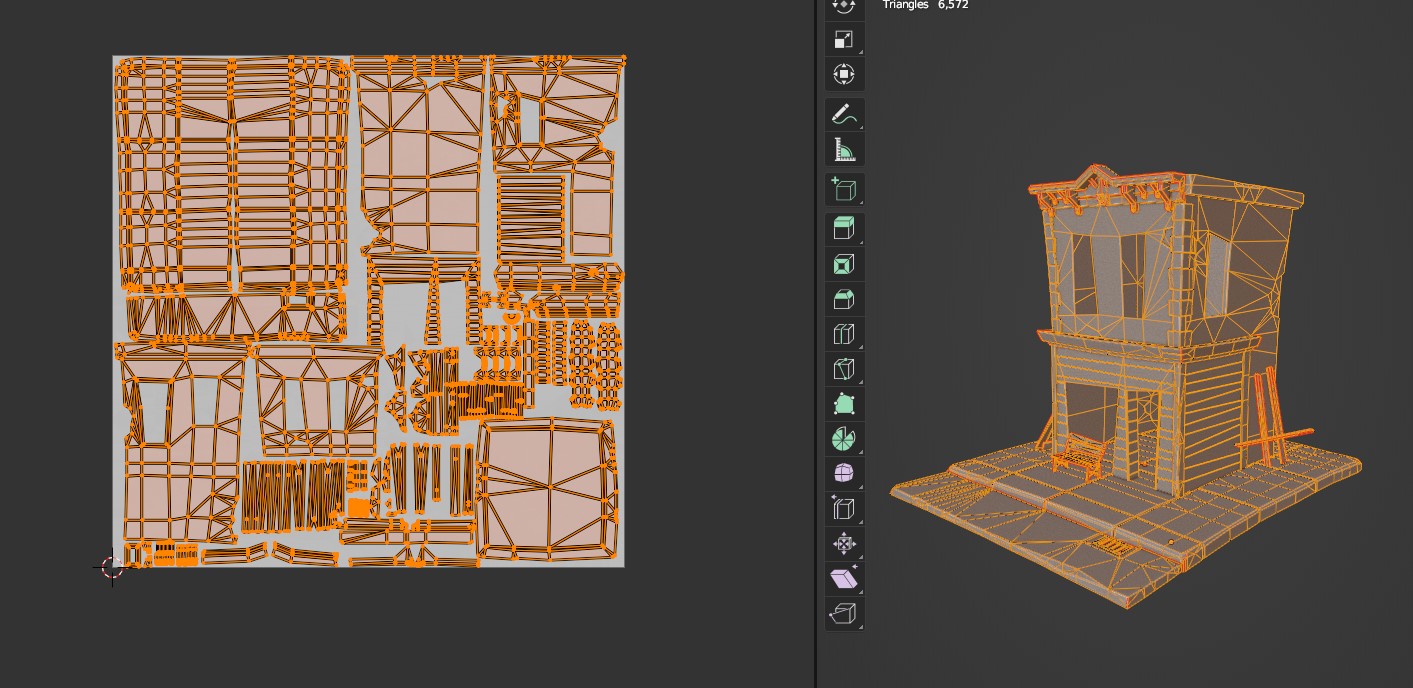
For this stage, I worked with Blender and RizomUV. I decided on using three sets of textures, as I've been told this method is preferred for games over using UDIMs.


TEXTURING
With that done, and after separating the objects, I could take it to Marmoset and bake the detail maps (normal, ambient occlusion, and curvature).
For the other texture sets, I baked them on substance because they didn’t have HP mesh. Then, I continued the last steps of the lookdev in Substance Painter.
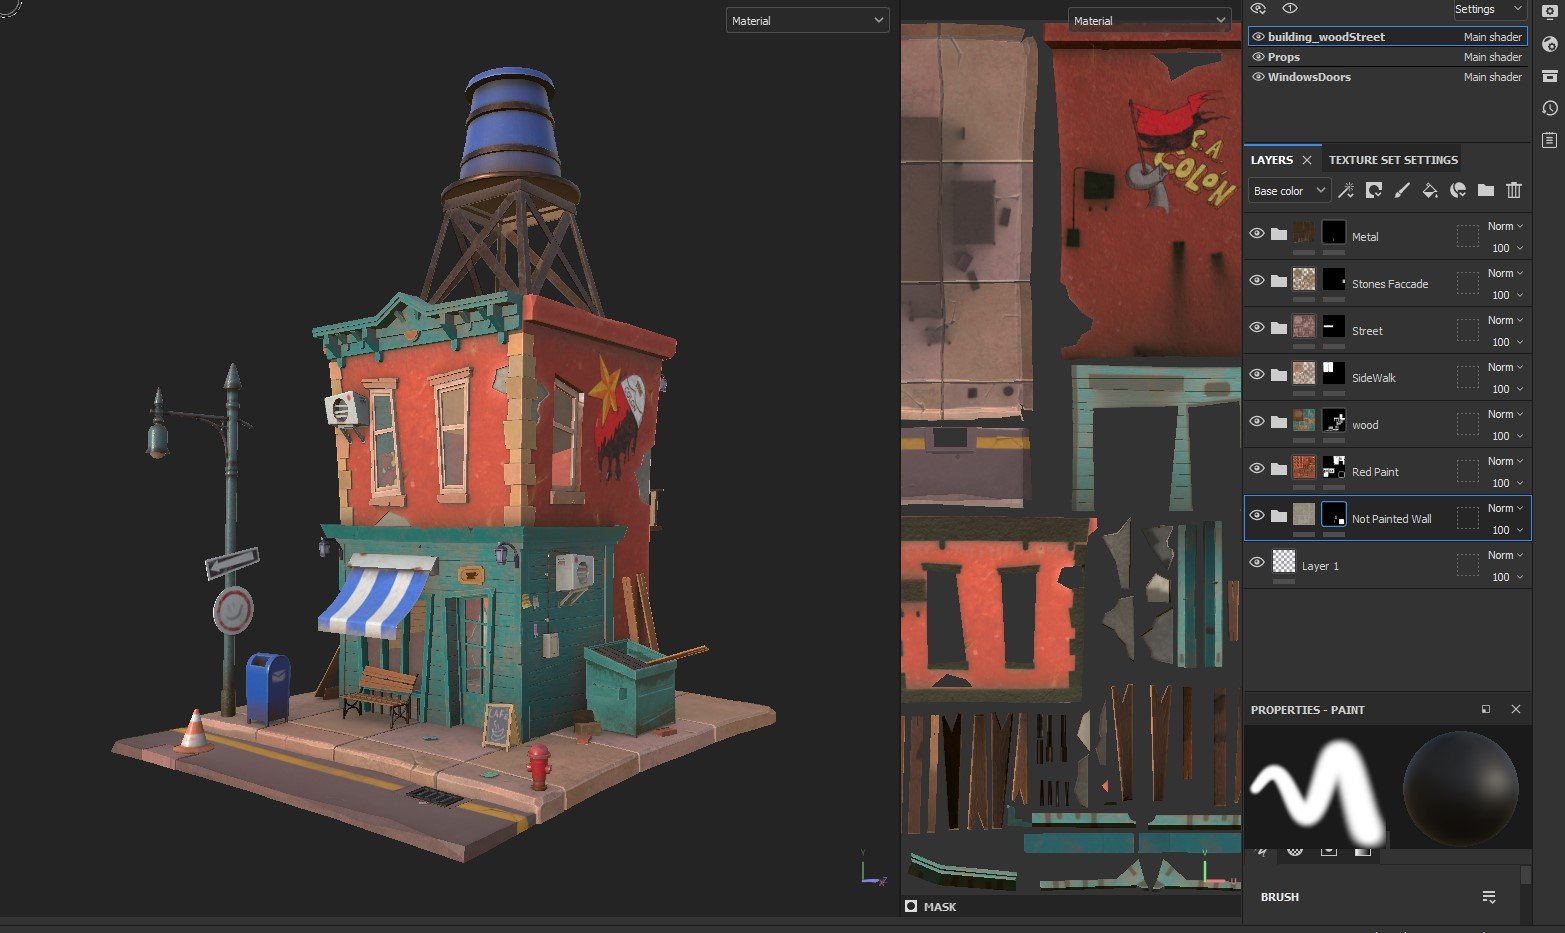
For the textures, I used a combination of details, black masks, and procedural textures. Creating nice and visually appealing textures involves more than just downloading pre-made textures and applying them to the mesh. It requires dedicated work to incorporate color variations, height information, roughness, and other elements to bring the textures to life.
I learned this valuable knowledge and approach to texturing from AENDOM. His breakdowns are truly amazing. AENDOM's expertise has been a great source of inspiration and learning for me!
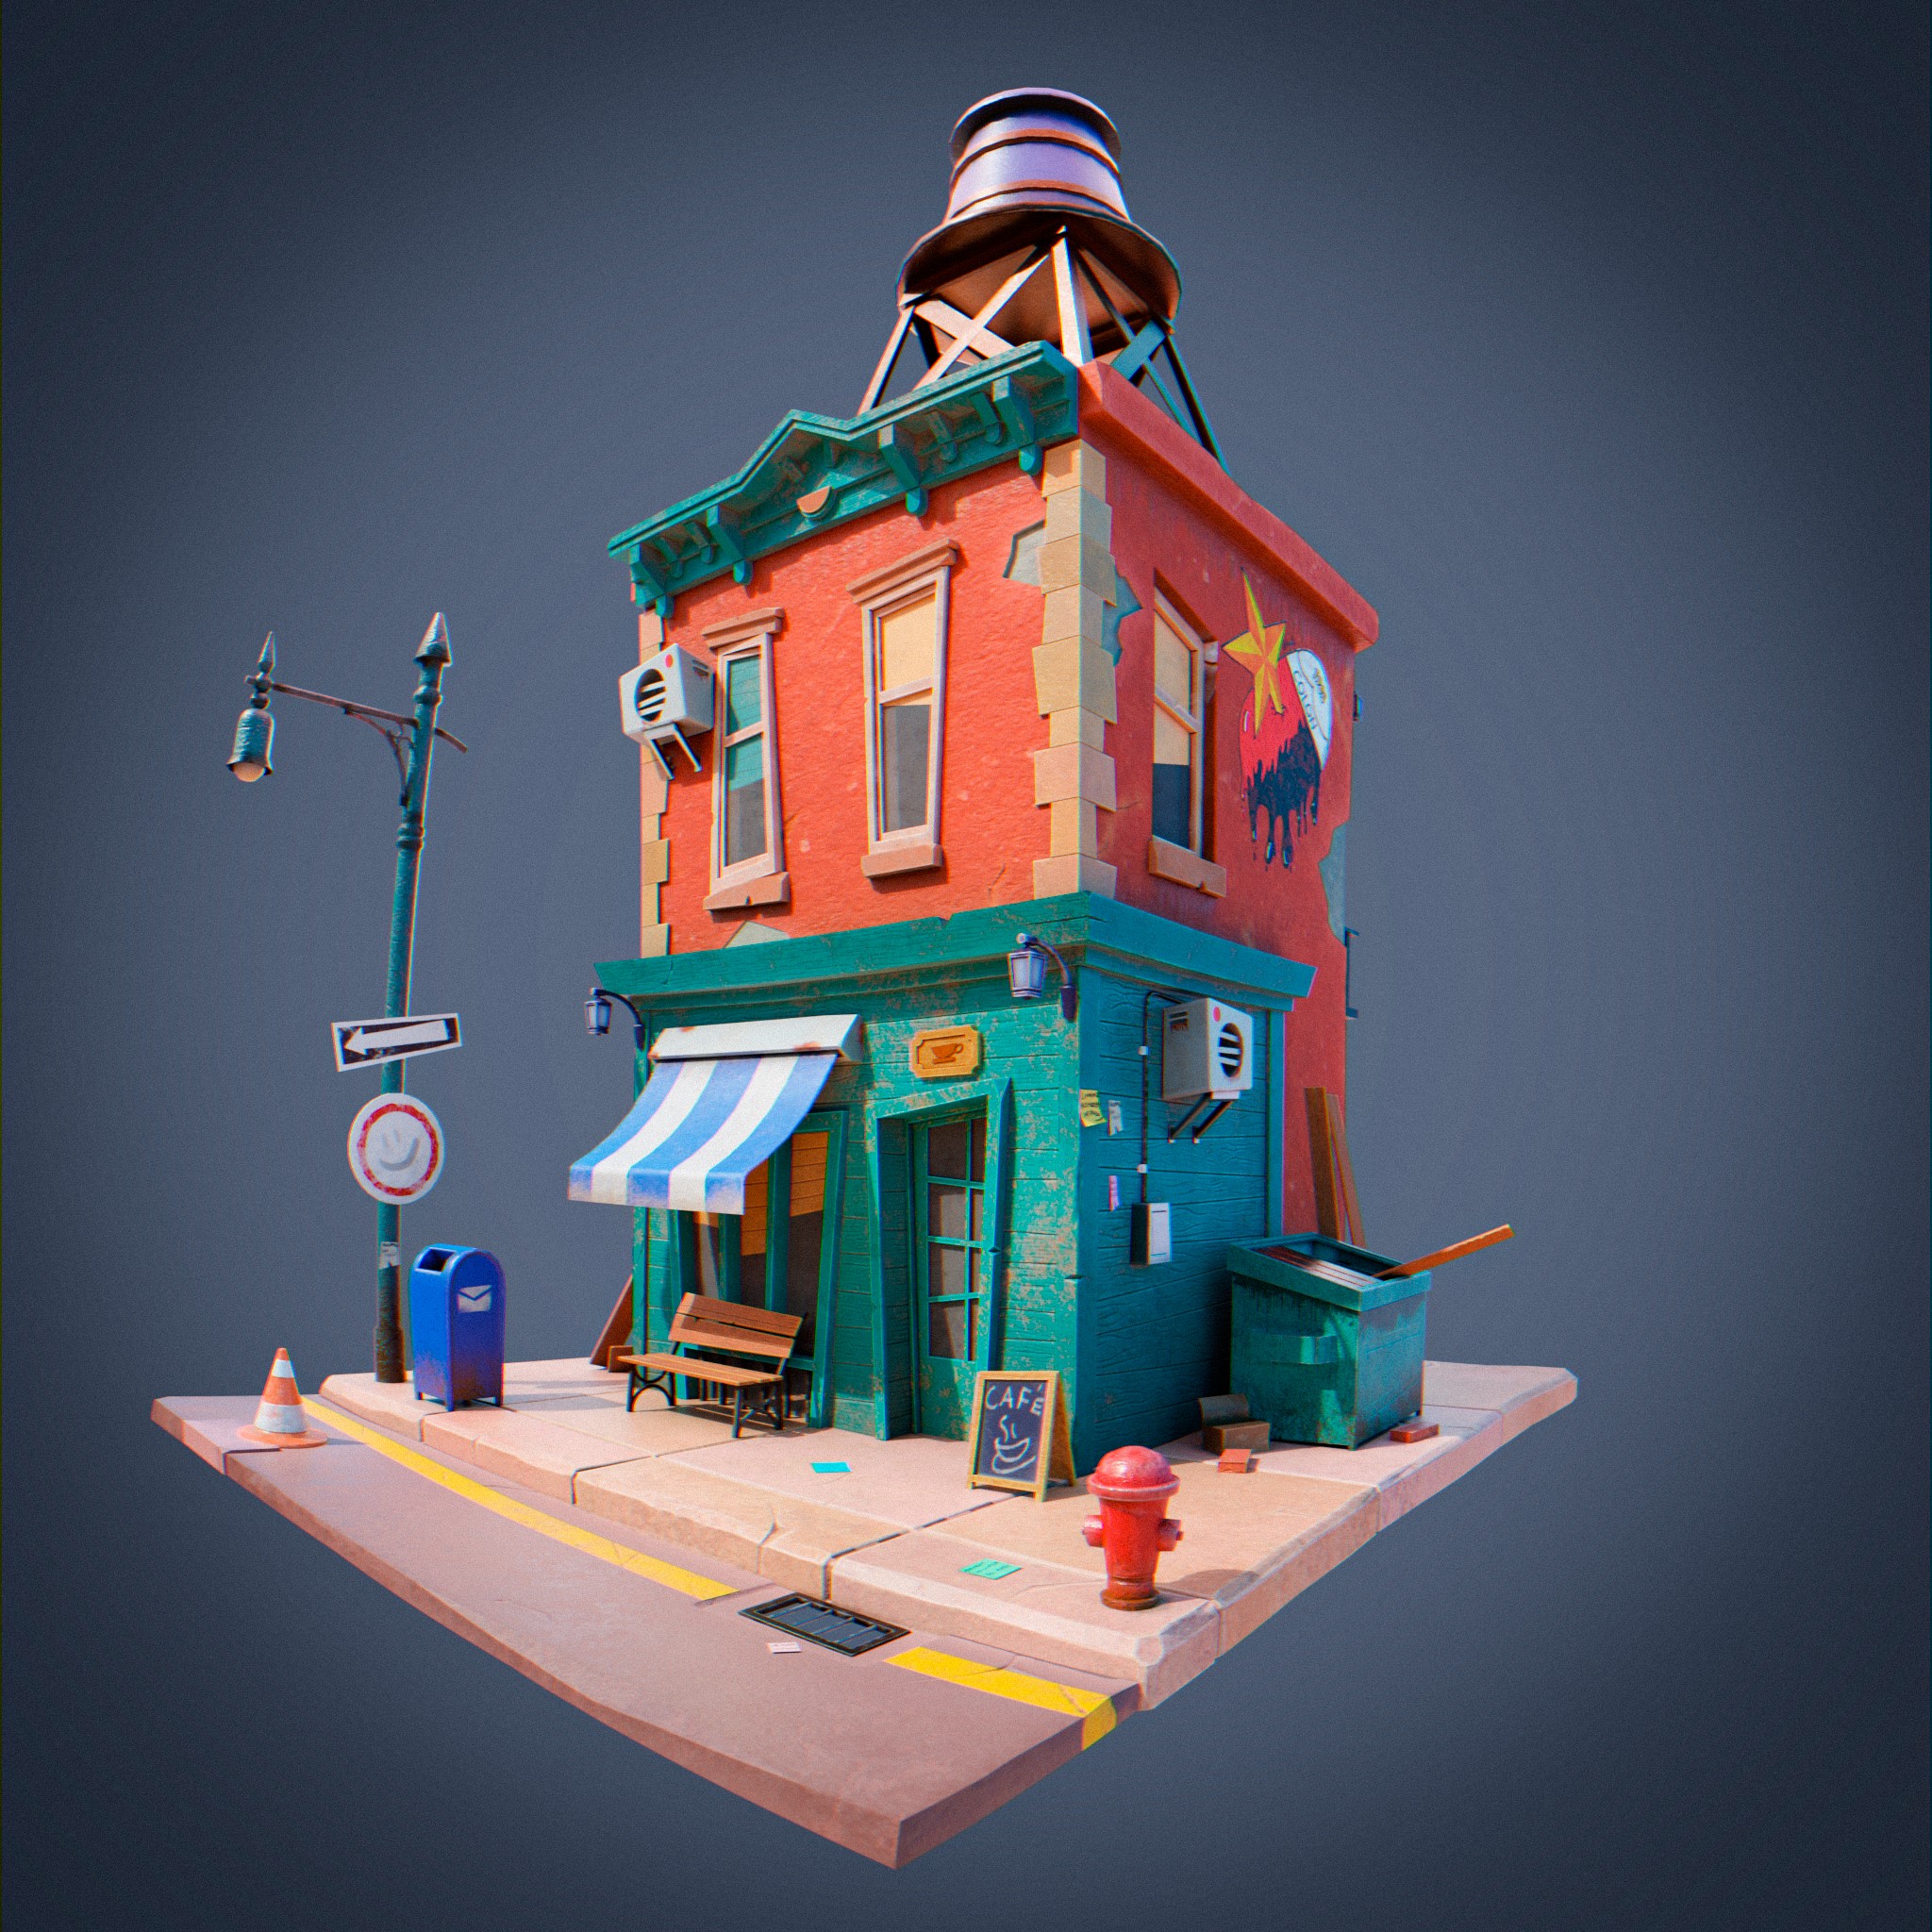
FINAL RENDERING
I used Cycles for my final renders and wanted to try UE5 for it, but an idea came to my mind and I only knew how to do it in Blender and cycles.
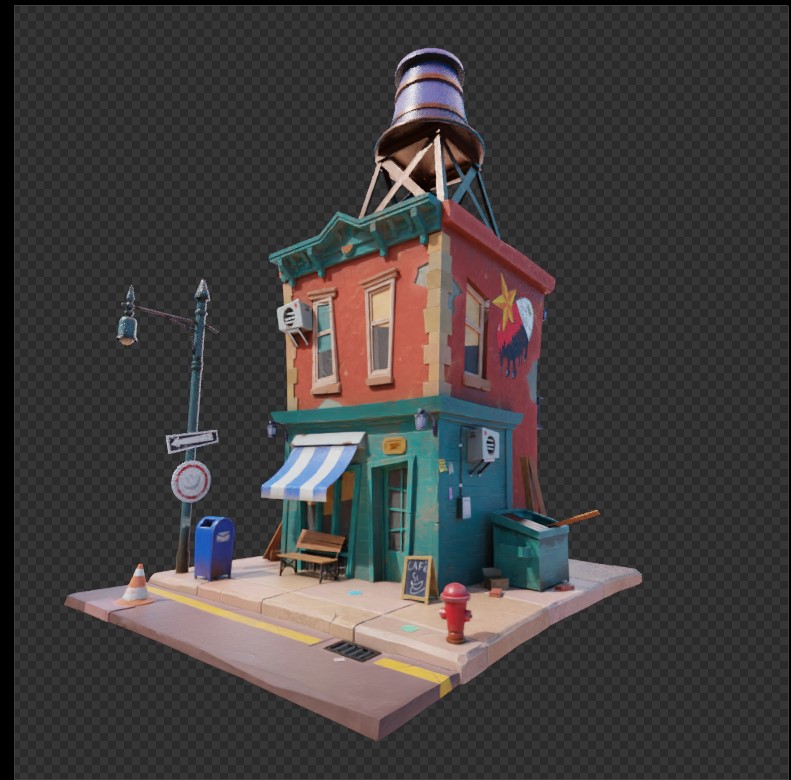
The viewport of the final render was looking like this, and I thought something was missing. I needed something more cartoonish, so I tried a fisheye look for the camera, and now it looks amazing!
The difference is subtle, but the final look is more fun to see. For the lights, I used an HDRI image as a base, but the main look is given by the set of lights and an emission map that covers most of the world light, as you can see in these screenshots.


Before the final render, I first created a pass in the compositor tab in Blender.
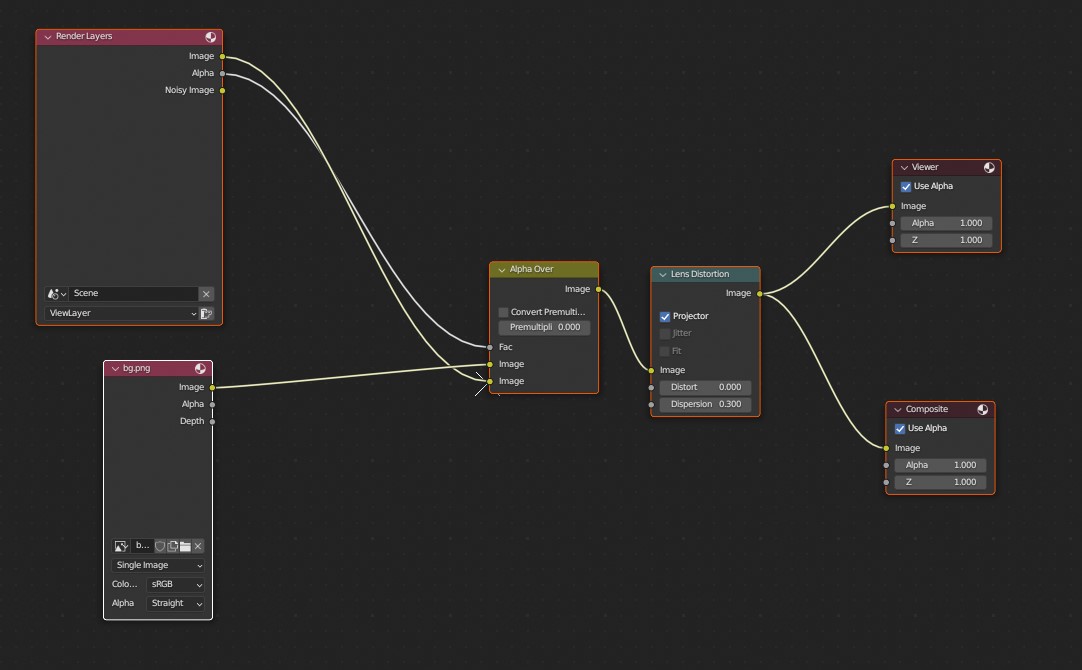
For this one, it's simple, just a basic color as BG, and a lens distortion node to add some chromatic aberration. The render above from Blender is not the final; for the final version, I edited the render in Photoshop, and then we have these final results. I hope you like them!
RENDER - NY Cafe
Thank you for your interest in reading this. Hope you have a nice day! See you soon ;D
About the Artist
Inti Manassero is a 3D artist from from Argentina.